You know those little cardboard sleeves for your coffee cup at Starbucks? You can easily make your own reusable, eco-friendly and cute version!
This pattern is also adjustable if you order different sizes or can accommodate your own special mugs. It's also a great way to use cotton scraps as it only requires a small strip of fabric for the exterior, interior and interfacing. Download the free pattern template here.
You'll need:
This pattern is also adjustable if you order different sizes or can accommodate your own special mugs. It's also a great way to use cotton scraps as it only requires a small strip of fabric for the exterior, interior and interfacing. Download the free pattern template here.
You'll need:
- small piece of interior fabric
- small piece of exterior fabric (can be the same if you choose)
- lightweight fusible interfacing
- matching thread
- 1 button (size isn't too strict but not too small, I'd say bigger than 1/4in)
- 3 inches of 1/8in elastic
- tailor's chalk
- A cutting mat and rotary cutter are helpful but not required
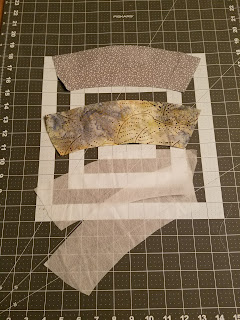
The top grey dot fabric is my interior and the batik print is the exterior. Iron your interfacing to the wrong side of each piece of your fabric.
Take your elastic loop and pin it in place, as shown in the photo above. The ends of the elastic should be at the end of the fabric and the loop going toward the middle. Make sure your loop isn't twisted! You can pin it to either of the short sides of the fabric. Within a 1/4 in of the edge of the fabric, stitch the elastic down to hold it in place. When you are done it should look like the photo below.
Next, you want to sew the exterior and interior fabrics together. Lay the fabric pieces on top of each other, with the right sides together and make sure that the elastic loop is in the middle.
 |
| 1/4 is just along the edge of my presser foot. |
Sew around the edges of the fabric with a 1/4in seam allowance, leaving a gap of about 2inches.
Through the gap, turn the sleeve with the right side out. Press the sleeve flat, ensuring that the seam allowance where you left the "escape" gap is properly tucked in. Top stitch around the whole sleeve, sealing the escape gap and providing a nice finish. For the top stitch, I like to use a slightly longer stitch length, usually a 3 on my machine instead of my normal 2.5.
Now you need to stitch on your button. Check the marking for where your button should go. I use my machine zig-zag stich to put the button by machine but you can also stitch it on by hand if you prefer. Now you're ready for a cup of coffee with your fun new sleeve!
This post contains affiliate links, if you make a purchase using one of these links this blog may receive a small commission at no additional cost to you. Thank you for your support of my fabric habit!


Comments
Post a Comment